

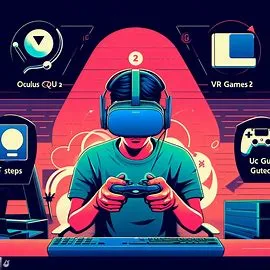
How to Play PC VR Games on Oculus Quest 2
Are you ready to take your VR gaming experience to the next level? With Oculus Link, you can unlock a whole new world of virtual reality gaming on your Oculus Quest 2.
In this comprehensive tutorial, you will learn step-by-step how to play PC VR games on your Quest 2, from setting up the necessary equipment to configuring the software.
We will cover everything you need to know, including potential pitfalls and best practices to ensure a smooth and enjoyable gaming experience.
Key Takeaways:
- Use Oculus Link cable: The Oculus Link cable allows you to connect your Oculus Quest 2 to your PC and play PC VR games with the highest graphics and performance.
- Enable Developer Mode: Enabling Developer Mode on your Oculus Quest 2 allows you to sideload applications, including VR games, from your PC to your headset.
- Explore wireless alternatives: While the Oculus Link cable provides the best performance, there are wireless alternatives such as the Virtual Desktop app, which can also allow you to play PC games on your Oculus Quest 2.
The Oculus Quest 2 is a fantastic standalone VR headset, but did you know you can also play PC VR games on it? In this comprehensive tutorial, we’ll guide you through the step-by-step process of connecting your Oculus Quest 2 to your PC for an enhanced virtual reality gaming experience.
Step 1: Check Your PC’s Compatibility Ensure that your PC meets the Oculus Link requirements. Check for a compatible USB-C port and make sure your graphics card and CPU meet the recommended specifications.
Step 2: Download and Install Oculus Software on PC Visit the official Oculus website and download the Oculus software for your PC. Follow the installation instructions to set up the software.
Step 3: Connect Oculus Quest 2 to Your PC Use a high-quality USB-C cable to connect your Oculus Quest 2 to your PC. For optimal performance, it’s recommended to use the official Oculus Link cable, but other compatible cables may work.
Step 4: Enable Oculus Link on Your Quest 2 Put on your Oculus Quest 2 headset, go to the Settings menu, and select the ‘Device’ tab. Find and enable Oculus Link. Your Quest 2 will prompt you to confirm the connection to your PC.
Step 5: Install Oculus Link Drivers If it’s your first time connecting, your PC may prompt you to install Oculus Link drivers. Follow the on-screen instructions to complete the installation.
Step 6: Launch Your PC VR Games Once the Oculus Link is set up, navigate to your PC’s Oculus software and select the ‘Library.’ You should see your PC VR games listed. Click on the game you want to play, and it will launch in your Oculus Quest 2 headset.
Step 7: Enjoy PC VR Gaming on Oculus Quest 2 Put on your Oculus Quest 2 headset, and you’re ready to dive into the immersive world of PC VR gaming. Explore your favorite titles with the freedom and flexibility of your Oculus Quest 2.
Tips and Troubleshooting:
- Ensure your USB-C cable is of high quality and supports data transfer.
- Update your graphics card drivers to the latest version for optimal performance.
- If you encounter lag or latency issues, try adjusting graphics settings in your PC VR game or upgrading your PC’s hardware.
I have explained more scenarios around troubleshooting below so you can read the whole step-by-step guide to enjoy PC VR games on oculus quest.
Setting Up Your Oculus Quest 2
The Oculus Quest 2 is a powerful standalone VR headset that also has the capability to play PC VR games. To ensure you have the best experience when playing PC VR games on your Oculus Quest 2, it’s essential to set up your headset correctly.
Initial Setup and First-Time Use
When you first unbox your Oculus Quest 2, it’s important to follow the initial setup and first-time use instructions provided by Oculus.
This includes setting up your Oculus account, adjusting the fit of the headset, and familiarizing yourself with the Oculus Touch controllers.
Make sure to set up a clear play area, free from any obstacles or hazards, for an optimal VR experience.
Updating Firmware for Optimal Performance

One of the most important steps in setting up your Oculus Quest 2 for PC VR gaming is to ensure that your headset’s firmware is up to date. This ensures that you have access to the latest features and optimizations, as well as important security updates.
To update the firmware, simply connect your Oculus Quest 2 to Wi-Fi and follow the on-screen instructions in the settings menu. Keeping your firmware updated is crucial for maintaining optimal performance and compatibility with PC VR games.
Preparing Your PC for VR Games
Assuming you already have an Oculus Quest 2 headset, the first step to playing PC VR games is preparing your PC for the experience.
This involves checking your system’s compatibility, installing necessary software and drivers, and ensuring that your PC meets the system requirements for VR gaming.
System Requirements and Compatibility Checks
Before diving into the world of PC VR gaming, it’s important to check whether your PC meets the system requirements for running VR games.
This includes checking your PC’s graphics card, CPU, RAM, and available storage space. You can find the specific system requirements for each VR game on the game’s official website or on the Oculus store.
Additionally, you’ll want to ensure that your PC has the necessary ports for connecting your Oculus Quest 2 headset, such as a USB-C port and a display port.
Installing Necessary Software and Drivers
Once you’ve verified that your PC meets the system requirements for VR gaming, the next step is to install the necessary software and drivers. This includes downloading and installing the Oculus app on your PC, which will guide you through the setup process and help you connect your Oculus Quest 2 headset to your PC.
You’ll also need to install the appropriate graphics card drivers and make sure that your PC is up to date with the latest updates and patches. This ensures that your PC is optimized for running VR games smoothly and without any technical hitches.
Connecting Oculus Quest 2 to Your PC
Despite the standalone capabilities of the Oculus Quest 2, you may want to explore the world of PC VR gaming for a wider variety of experiences. To do this, you will need to connect your Oculus Quest 2 to your PC using a compatible cable or through a wireless connection.
Understanding Oculus Link and Virtual Desktop
When connecting your Oculus Quest 2 to your PC, you have two primary options: Oculus Link and Virtual Desktop. Oculus Link allows you to connect your Quest 2 to your PC using a USB C cable, essentially turning your headset into a PC VR headset.
Virtual Desktop, on the other hand, uses your Wi-Fi network to wirelessly stream PC VR games to your Quest 2.
Step-by-Step Guide to Wired and Wireless Connections

Here is a breakdown of the step-by-step process for both wired and wireless connections:
| Wired Connection (Oculus Link) | Wireless Connection (Virtual Desktop) |
| – Ensure your PC meets the Oculus Link requirements – Connect your Oculus Quest 2 to your PC using a compatible USB C cable – Enable Oculus Link on your Quest 2 – Access and launch PC VR games from the Oculus PC app |
– Purchase and install Virtual Desktop on your Quest 2 and PC – Install the Virtual Desktop streamer app on your PC – Enable developer mode on your Quest 2 and sideload the Virtual Desktop patch – Connect your Quest 2 to your PC wirelessly through the Virtual Desktop app |
By following these steps, you will be able to seamlessly connect your Oculus Quest 2 to your PC and enjoy a wide range of PC VR games and experiences.
However, it is possible to unlock the full potential of your Oculus Quest 2 by playing PC VR games on it. With the help of Oculus Link, you can connect your headset to a compatible PC and access a wide range of VR games that are not available on the Quest platform.
This comprehensive tutorial will guide you through the process and provide tips for a smooth and enjoyable gaming experience.
Launching and Navigating Games via Oculus Link
Once you have set up Oculus Link and connected your Quest 2 to your PC, you can launch and navigate PC VR games directly from your headset. Simply put on your Quest 2, navigate to the Oculus Link app in your library, select the game you want to play, and enjoy a seamless VR gaming experience.
Tips for a Smooth VR Gaming Experience
When playing PC VR games on your Oculus Quest 2, there are a few things you can do to ensure a smooth and enjoyable experience. Here are some tips to help you make the most of your gaming sessions:
- Ensure your PC meets the minimum requirements: Before diving into PC VR gaming, make sure your computer meets the minimum hardware and software requirements for VR gaming.
- Clear your play area: Create a clear and open space for playing VR games to avoid accidents or interruptions.
- Adjust your headset properly: Properly adjust your Quest 2 headset for a comfortable and clear viewing experience.
- Take regular breaks: VR gaming can be intense, so remember to take regular breaks to rest your eyes and prevent motion sickness.
This will help ensure that you have a smooth, immersive, and enjoyable gaming experience every time you play PC VR games on your Oculus Quest 2.
Conclusion:
In conclusion, diving into the world of PC VR gaming on your Oculus Quest 2 can elevate your virtual reality experience to new heights. The comprehensive tutorial provided here walks you through the essential steps, from setting up your Oculus Quest 2 for optimal performance to connecting it to your PC using Oculus Link or exploring wireless alternatives like Virtual Desktop.